 |
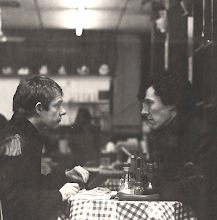
| Original Photo |
 |
| Original Photo |
 |
| Edited Photo - Montaged using photoshop (1) |
 |
Edited Photo- Montaged and experimented
with levels and blue and red filters with low opacity. (2) |
1.) In Photoshop, the technique I used to create thsi montage is the effect "overlay". Firstly I placed the iamges over one another, and changed the setting from "normal" to "overlay", I could use this effect or "soft light" to create an overlay effect, or also using the "fill" or "opacity" layer options, but I prefer to use overlay as it tends to get a neater merge between the photos. I then edited the colours a little by using "levels".
2.) For the second photo, I created red and blue filter layers for the montage. I created duplicates of the montaged photo, and merged the blue to one and the red to the other. Then, I put the blue layer on "soft light" to create a blue tint to the photo and then did the same but "hard light" to the red one, moving it left slightly so you could see both the colours. This created another layered effect but only with the selected colours. I then made sure to edit the opacity of these layers so that it did not stand out too brightly. This was the result I ended up with.
To improve these images I would probably spend a little more time on the montages, making them a little more detailed by including more of the dark room photographs into them and then trying to create some kind of meaning behind the photos rather than just a basic montage.


butt face
ReplyDelete